Collimation
Collimation is the process of precisely aligning your telescope optics so they produce the best image with the minimum distortion and loss of light. Collimating a Newtonian telescope requires aligning the diagonal and primary mirrors. If you have already done our rough alignment procedure to locate the primary mirror in the cell, you have already done a very quick collimation. On this page we will walk you through the detailed procedure to get an excellent alignment.
Typically, the collimation of the diagonal mirror, once done, typically does not need to be redone unless the scope takes a very bad fall or knock. The low mass of the diagonal usually means it will not get knocked out of alignment with typical handling of your scope. However the much higher mass primary mirror will often need to be "touched up" for best alignment fairly often, particularly if your scope is moved to an observing site and back often. The good news is this is quick and easy to do in the field, and can be done in a minute or two after setup.
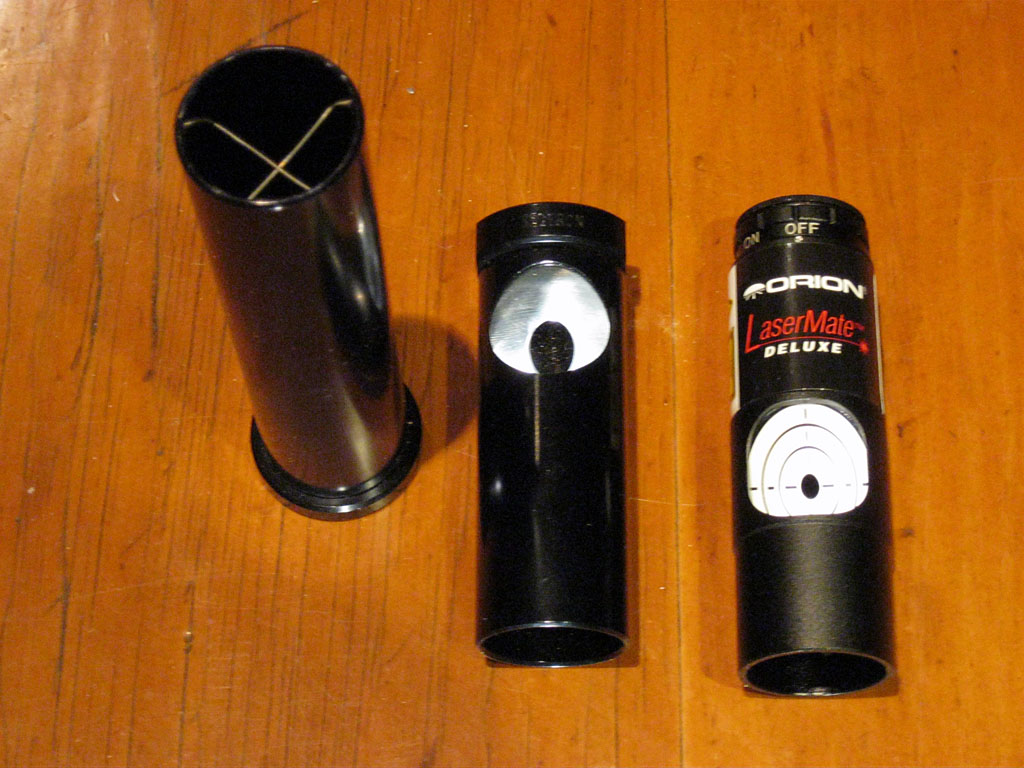
Collimation Aids: You can do a collimation without any special tools or aids, but there are some popular aids that make the job easier, faster or possible in the dark. Without aids, you need to collimate your scope in a lighted environment - you need to see diagonal and primary mirrors, both their surfaces and edges. A Cheshire Eyepiece and a Flashlight will let you work in the dark, and a Laser Collimator will let you adjust your collimation in the dark. A Sight Tube will be helpful in all of the steps, but needs to be used in a lighted environment. Any of these tools will also likely increase the accuracy of your alignment. We will talk about how to use these tools in each collimation step below.
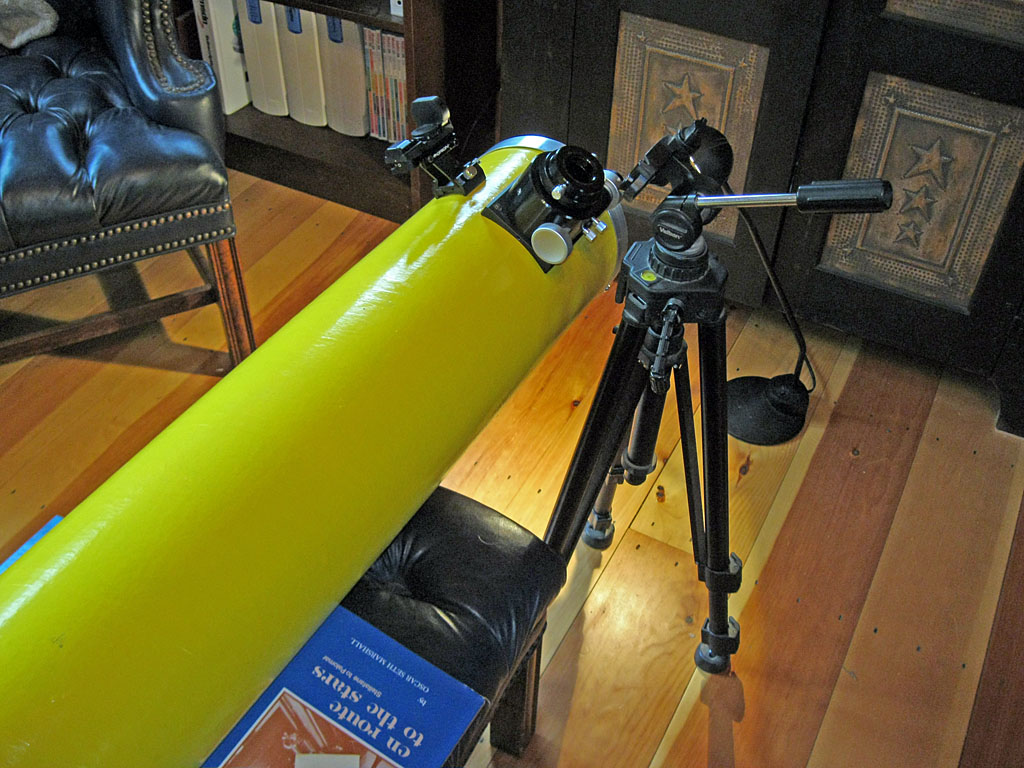
Before You Begin: We assume you have put a Collimation Mark in the center of primary mirror, and recommend using a blackened binder reinforcement so that you have a shiny spot in the middle should you wish to use a laser collimator now or in the future. We also suggest that you have done all the mechanical work on your tube that you plan to (for now), and all parts are rigidly installed in or on the tube. If your tube does not yet have a mount, find a place it can rest at a convenient height - perhaps across the arms of an armchair or on an ottoman.
Overview: Collimation of a Newtonian occurs in three simple steps: (1) Center the diagonal mirror under the focuser; (2) Aim the diagonal mirror at the center of the primary mirror; and (3) Aim the primary mirror at the center of the diagonal. Note that step 3 can be challenging if you are working alone, as it is usually hard to keep your eye near the focuser and reach the primary mirror adjustments. Also note that Collimation can be iterative; you might go through set of steps twice or more, as some adjustments can make impact previous adjustments.
Confusing Images?: When you look down the focuser with light shining into the tube, you will see a possibly confusing set of images: the focuser drawtube, the actual diagonal mirror, a reflection in the diagonal mirror of the far end of the tube including the primary mirror. If you are anywhere close to alignment, you will see in the primary mirror the diagonal mirror, the focuser drawtube, and perhaps even an image of your eye. Take you time, think about what you are seeing, and pick out the various items and their reflections. For each step, you only need to focus on one of these items, so keep your wits about you and ignore the images that are not an important part of the current step.
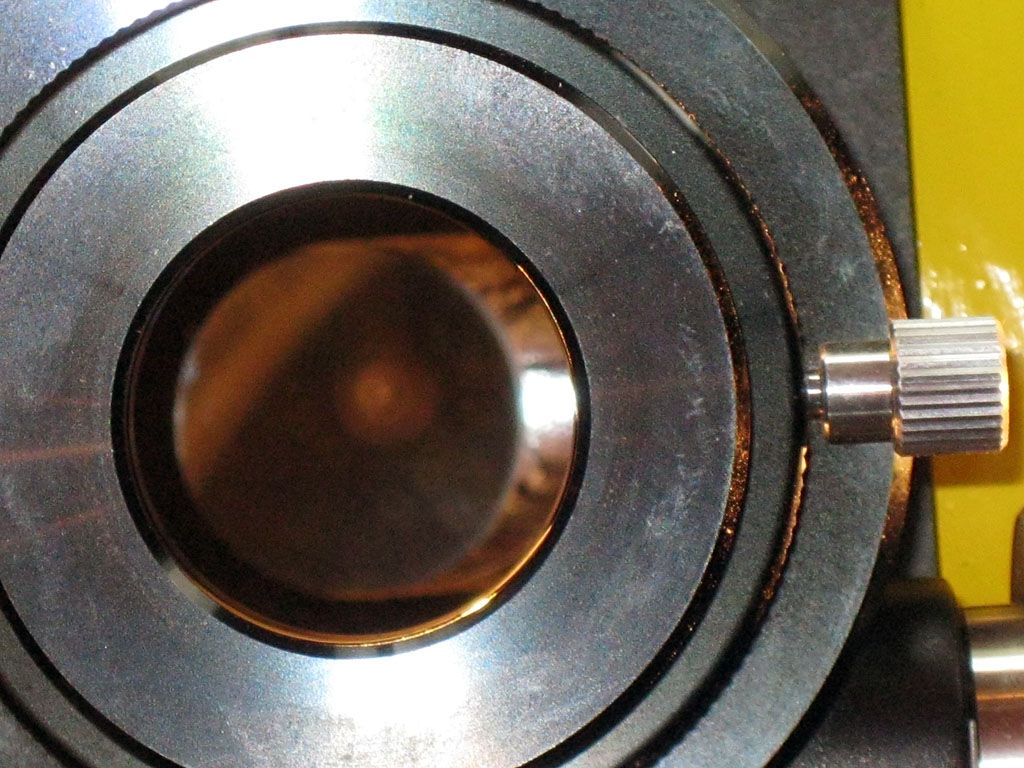
Step 1: Center the Diagonal under the Focuser: The 45° elliptical diagonal will appear round when viewed through the focuser, and it should be centered and look round when peering in through the focuser tube. Rack your focuser in as far as it will go, or until the far end of the focuser drawtube just surrounds the diagonal. Keeping your eye centered on the focuser, adjust the diagonal position (distance into the tube and rotation) until it appears centered and round in the focuser. Sliding a piece of white paper into the front of the tube, under the focuser and diagonal, might help you concentrate on the edge of the diagonal and drawtube for this step. A Sight Tube can be useful for this step - push it into the focuser to get a "tight" visual fit around the image of the diagonal mirror, and keep the peep hole and cross hairs aligned to be sure your eye is not viewing at an angle.
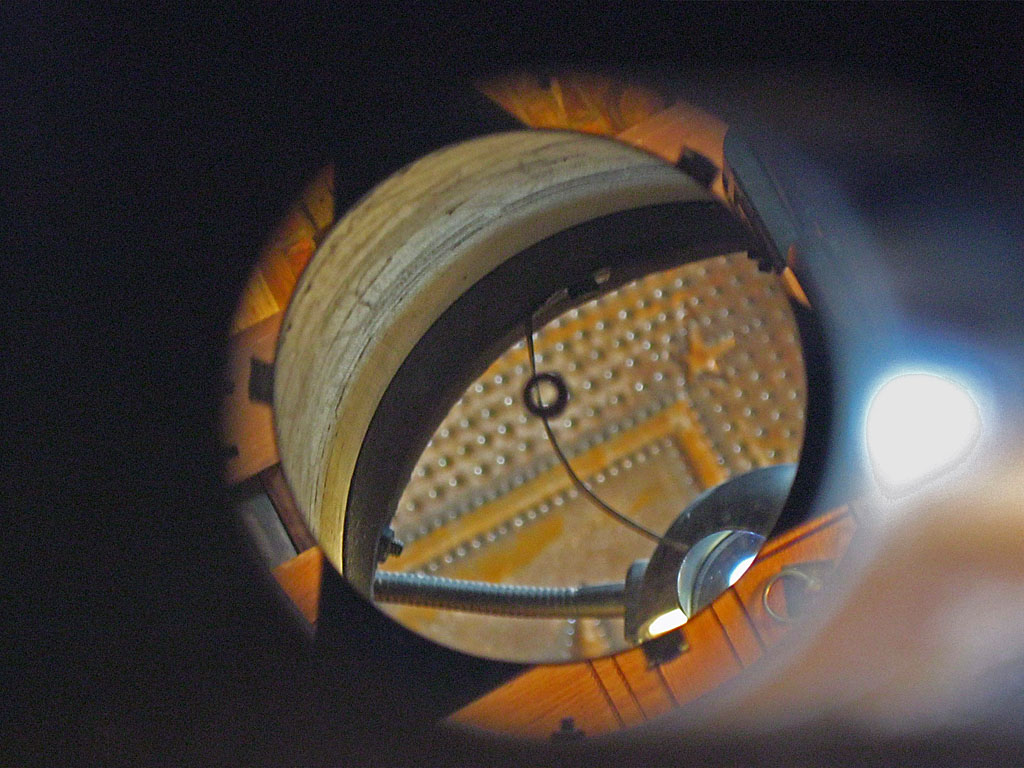
Step 2: Aim the Diagonal at the Center of the Primary: Now you need to adjust the tip and tilt of the diagonal mirror to aim it at the center of the primary. This also means that the image of the primary mirror will be centered in the diagonal, concentric with the diagonal's edge. You must ignore what you may see reflected in the primary at this step - concentrate on getting the edge of the primary mirror centered in the reflection up the focuser from the diagonal. It helps to have light coming into the tube for this step, to make the primary more apparent and to de-emphasize what it reflects. A Cheshire Eyepiece or Sight Tube can help with this centering by keeping your eye in the center of the focuser. If you have a laser collimator, you can use it to center the laser beam inside the collimation mark on the primary (be careful not to look at the reflected bean off the primary, which can be almost anywhere since the primary is not adjusted yet!).
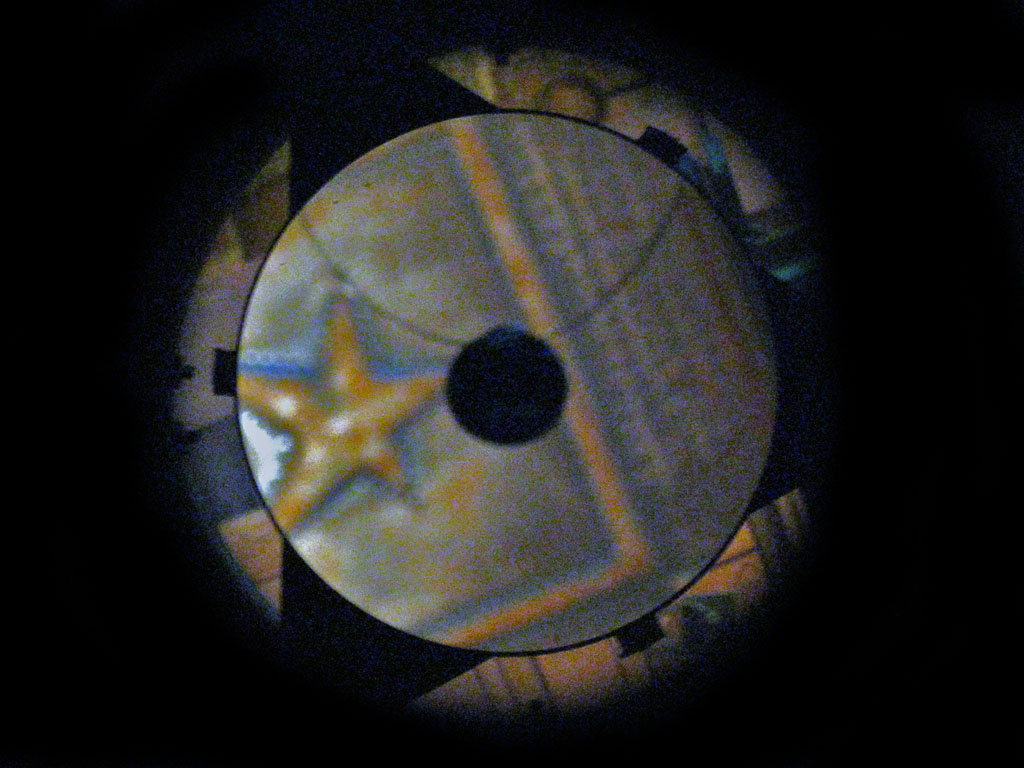
Step 3: Aim the Primary at the Diagonal: With step1 and step 2 complete and the diagonal mirror now pointing correctly, we now aim the primary mirror back at the diagonal, completing collimation. This is visually easy to do, as the small diameter of the diagonal is fairly easy to center over the collimation mark on the primary, as seen from the focuser in the primary's reflection. Of course, unless you have a vey small telescope, you need to adjust the primary, then move back to the focuser to view the result, and repeat until you get it just right. If you have a Cheshire Eyepiece or Sight Tube, you should see the cross hairs and the collimation mark centered on them; you are now bring the image of the diagonal in the primary to be centered with these other objects. If you have a laser collimator, you want the beam to reflect back on itself. Do a rough visual alignment, then use the laser to zero in of the final adjustment.
OK, you did it! You have a collimated telescope you built yourself! We still have a few more pages in this Optical Tube Assembly section for Accessories and Options, things you might want to have for your telescope, so don't stop reading just yet. And of course, you will want to go on to build our Dobsonian Mount for this OTA in the next section.
Previous: Final Assembly Next:
Eyepieces
Back to the Build a Dobsonian Master Index