
Solar Filter
A solar filter can show you sun spots and provide a daytime astronomical use for your telescope. This easy to build solar filter is a small project that can be completed quickly and add to the versatility of your telescope.
Danger!
- Never look directly at the sun with an unfiltered telescope. You can permanently damage your eye or blind yourself doing this.
- Cover and cap you finder(s). And always cover your telescope when not in use. You can set something on fire or burn yourself if you don't do this.
- Only use approved, undamaged solar filter material that blocks UV rays.
- Never let a child use a telescope in the daytime without continuous adult supervision.

The first photo shows our solar filter on our OTA. The solar filter fits on the end of the OTA and is held in place by two mini-bungee cords.
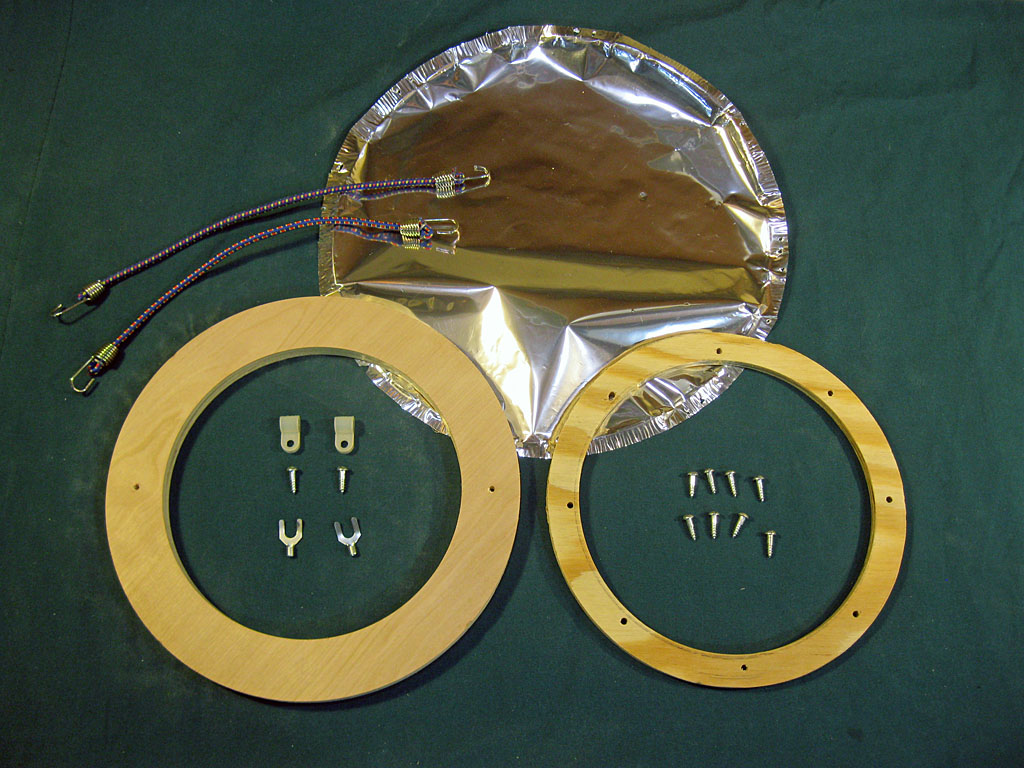
The second photo shows the parts we used - you can adjust these to your preferences and conditions.
The solar filter material is a flexible Mylar like material that reduces the solar brightness and rejects damaging ultraviolet radiation. Search for Solar Skreen or Baader Astro Solar Safety Film. Some of these films have photographic versions - only use films made for visual use. The piece we show is being reused from another project. In 2013, an approximately 1 square foot piece of this material will cost about $40 USD.
The ring on the left is the main ring - it is made from ½-inch plywood and will be painted yellow. The outer diameter is sized to be slightly lager than our outside tube diameter. The inside diameter is slightly larger than our primary mirror diameter (6-3/8 inches for a 6 inch mirror).
The ring on the right is the clamp and centering ring. It is made from ¼-inch plywood and will be painted black. Its outside diameter is just slightly smaller than our tube inside diameter, so that it can fit inside the tube and keep the filter centered. The inside diameter is the same as the other ring.
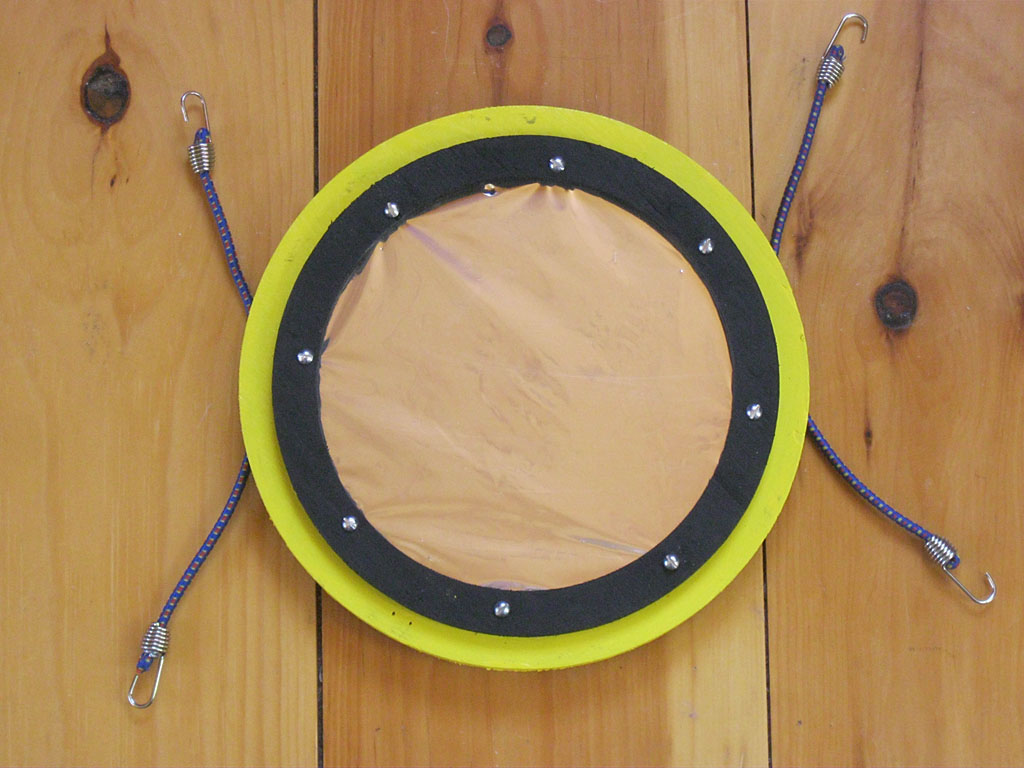
The clamp ring is attached to the main ring with eight #6x½ wood screws (see photo 3). Do not worry about small wrinkles or ripples in the film when you clamp it - these will not affect the image. We clamped the film, and then used a sharp knife run around the outside of the clamp ring to trim off the excess.
It would be dangerous to have your filter fall off when observing, so make sue it is firmly attached to your telescope. We used two electrical lugs slipped under two tube ring bolts and bent up slightly to provide a hook-on point for the mini-bungee cords (see photo 1). Plastic cable clamps hold the bungees to the filter main ring. Both the lugs and cable clamps can be found at electrical parts stores, home centers or hardware stores.
The hard part of this project is cutting the two rings - but since they are not bearings, they do not have to be perfect - they will just look better if they are as round as possible. Enjoy viewing those sunspots!
Previous: Tube Rings
Back to the Build a Dobsonian Master Index