"The Monster Scope"
Brent Russell of South Africa
1999-Jun-21I was lucky enough to lay my hands on some nice glass around Christmas time 1998. I got a
10", a 14" and a 16" blank, all for R300 ($50) a very good price indeed!!.
The 16" had been ground and half polished already, but the fine grinding was badly done, so I
redid 600 grit and polished. However problems arose, It had astigmatism. This is when one axes of the mirror has
a longer focal length than the rest of the mirror.
April 1: I managed to combat the astigmatism by polishing with long tool on top strokes along
the shorter axis. The strokes tend to lengthen the focal length of that axis. After a few attempts the figure
was appallingly bizarre, but after a half hour of regular round-the-barrel-1/3-w-strokes the mirror now has a
perfect figure of revolution. As I write, I have another 3 hours or so of polishing to go. Easter starts
tomorrow, and hopefully I'll get all the polishing done this weekend. Then its on to the figuring. So far the
mirror is very smooth and spherical with no signs of TDE the dreaded bane of my life!!
April 8: I have finished polishing and begun to figure the mirror. So far the edge looks good
and the figure is coming along nicely. It is currently at about 1/4 wave, and I want to star test it before I
continue. I always take the readings I get from Tex with a pinch of salt. Not because I don't trust the program,
but because I don't trust my measurements, I want to try to use the star test as my final figure test as it
tests the whole system and is less error prone.
May 21: The mirror is fully polished and has been half figured. According to the star test
the images inside and outside of focus look pretty close but with the appalling seeing we've had that means very
little, maybe this weekend I'll get it on the test stand to check the figure.
May 25: Did a Ronchi and star test on the mirror last night. The ronchigram showed no signs
of TDE at all, this is certainly the best edge I have put on a mirror in my limited 5 mirror experience! The
Star test showed about half a wave over-correction which matches up the view on the Foucault stand. Foucult
shadows show a nice parabola(a bit deep), very smooth with no roughness, but with a central divot due to my
over-eagerness with a 6" tool! A little bit of cold pressing with the 12" tool and some 1/3 W should bring the
center up and the over-correction should flatten out somewhat. I always prefer to have to correct an over
corrected optic, it is an easier and more natural procedure. Hopefully I'll get this thing finished soon.
June 15: After some star testing I have decided to call it quits. I reckon I have better than
1/4 wave according to Suiter's diagrams so I am happy. The in focus star images are great so I guess I'll leave
it for now.
The star test shows very little over correction, using a 33% mask and the
secondary-shadow-breakout measurement, there is VERY little between the two. The outer diffraction ring is
pretty close (within 20%) both inside and outside of focus. The only defect is slight depressed zone at about 90
% that can be seen in the star test, but it will not ruin the image. So the mirror is off to the coater's
tomorrow. I tried cleaning a small mirror with acetone, it works great! I'll soak the mirror in soapy water for
an hour or two to remove any cerium residue on the edges. I'll then do a rub with nitric acid to clean any oil
off the surface, followed by a rinse with distilled water and finally a rinse with acetone to remove any water
and to stop any mineral deposits on the mirror face.
June 17: Cleaned the mirror last night, the acetone method worked really great, so today the
mirror goes to the coater's. Hopefully it gets done quickly, although I don't have any eyepieces to use with the
scope as of yet as I sold my others with my 12" scope. I have ordered some more from Joseph O'Neil he was really
helpful and hopefully I should have my eyepieces next week. I have ordered a 32mm Televue plossel (68x
magnification), a 20mm Televue plossel(110x magnification) and a 7.5 mm Antares Ultrascopic (293x magnification)
The Antares are made by the same company that makes Orion Ultrascopics.
Design and Mounting of the Optics
The mount is very similar to the 12" scope, all pine ply, but with a lot more effort to make
it neat and professional looking. The scope is painted white with an enamel paint, this is waterproof as well as
abrasion resistant. The trusses are 1.2mm wall thickness and 19 mm diameter, this makes for a very light scope.
I used an brilliant clamping method I got from Willie Koorts (Thanks Willie!) for the lower ends of the trusses
and a rather interesting self designed clamp for the upper ends.
Descriptions of Photos
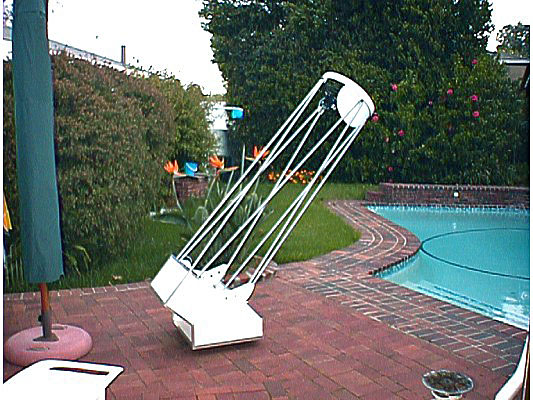
1. Here is the complete scope. 15.5" f5.7. It stands about 7.5 feet tall at zenith. Because of the
lightweight construction the whole scope weighs in at less than 20kg. The trusses are 19mm aluminum with 1.2mm
wall thickness. The truss tubes are also filled with an expanded polyurethane foam. This reduces vibration,
enhances rigidity and adds very little weight to the scope. I have had no problems with stability. Because of
the light weight of the scope upper end I have no weights at the bottom. Rather in following picture you can see
a small 500 gram lead weight on the upper ring to give it it's final balance.
2. What the photons see! Here you can see the primary, uncoated, in the cell as well as the 'L' shaped spider
vanes to enhance rigidity.
3. The upper ring is made from a plywood laminate I did myself. It is pine veneer resined to make a plywood.
It was then finished with a layer of very fine glass fiber. The spider vanes are clearly seen here, they are
made from 0.6mm galvanized steel and each vane is actually two smaller vanes. The finder scope is from and old
pair of 8x30 binoculars. Next to the focuser is a wire carrying 12 volts up the trusses to the diagonal heating
system. This power also powers a fan to cool the primary. The focuser shelf is two plates of aluminum one 2mm
thick the other 3mm thick that are separated by 15mm thick pillars of aluminum bar-stock. This creates a very
light and VERY strong rigid shelf to attach the truss to.
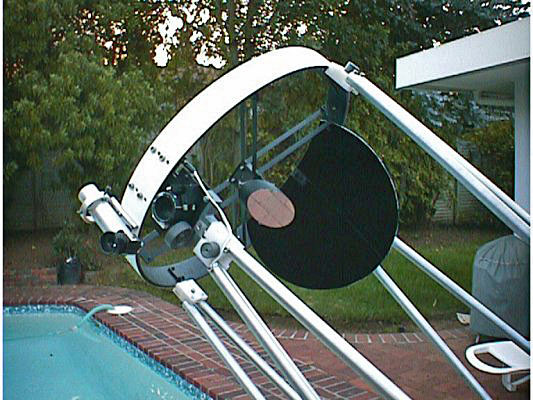
4. The diagonal seen from behind. There are four resistors to heat the diagonal to stop dewing on those cold
wet nights. The power runs along a small wire along the back of the vane, it can just be seen here. The diagonal
mounting is homemade from machined aluminum, and is adjustable both axially as well as the three axes required
for collimation. IT is great design if I say so myself, even with lots of detachment and reattachment of the
upper ring, the collimation stays perfect. It is quite light and is strong too. All the bolts and fasteners are
stainless.
5. The business end of the scope. The 1.5 inch thick16 inch blank on it's cell. The mirror weighs about 10kg.
As it stands here, it is fully polished and half figured. The cell construction is all aluminum and is an 18
point flotation system. You can also see the 'high-tech' rubber bands holding the cell correctly in position!
All the aluminum on the scope is home anodized, a very simple and effective process. You can also see in the
back of the mirror-box, the hole in which the cooling fan fits. This will allow the mirror to reach thermal
equilibrium more quickly.
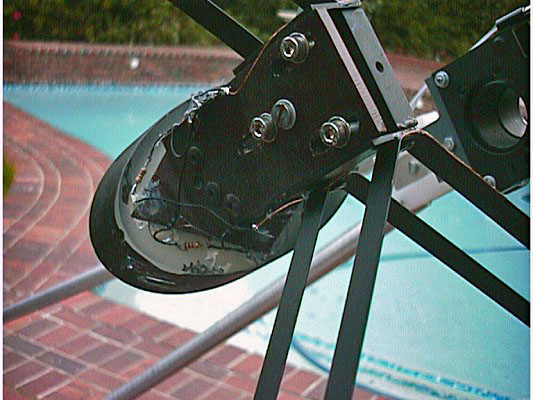
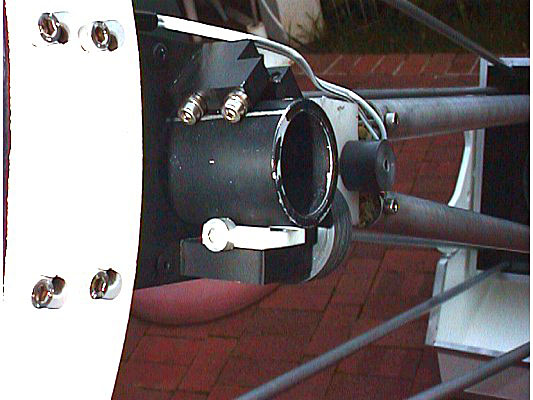
6. I used over-center clamps with rubber pieces than expand when the clamp is tightened. I got this idea from
Willie Koorts another ATMer in Cape Town. These clamps work very well and they make assembly very quick indeed.
Check out the diagram on his
web page.
7. Here is the focuser. All aluminum, with small ball bearings for the rollers and a Teflon bearing for the
focuser mechanism. It gives a wonderfully smooth motion, MUCH better than any helical focuser will ever be. The
clamp for the upper end of the trusses can also be seen. It is a block of HDPE with both trusses permanently
attached to it. The HDPE block has a slot machined into it, a bolt(attached to the focuser board) with a
thumbscrew fits into the slot and once tightened it locks perfectly in place. I can assemble the entire scope in
3 minutes easily.
|


