|
||||
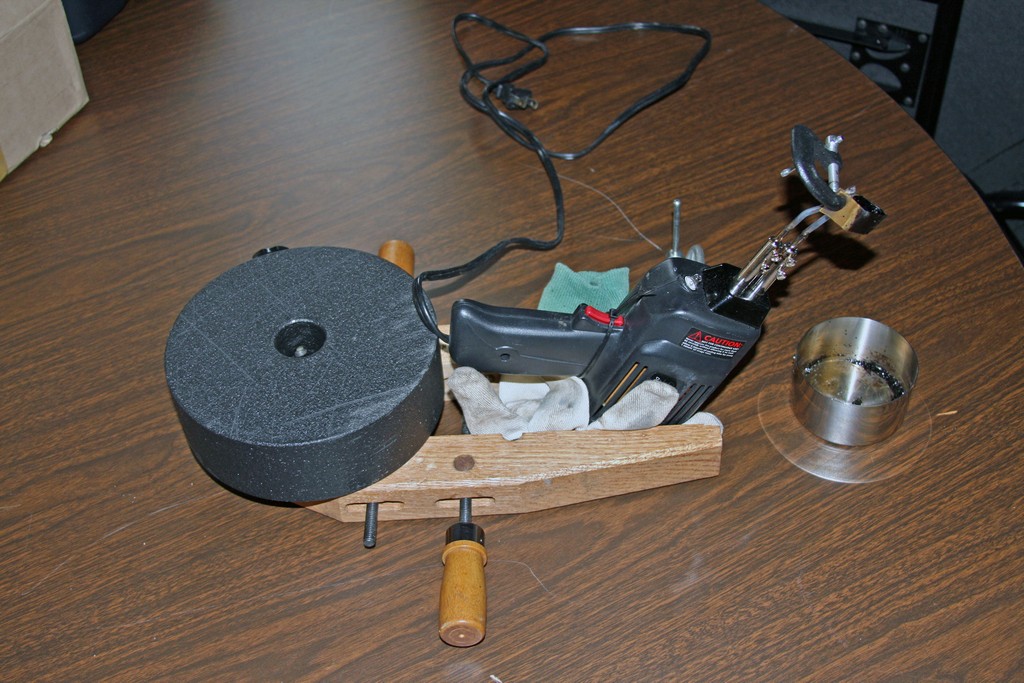
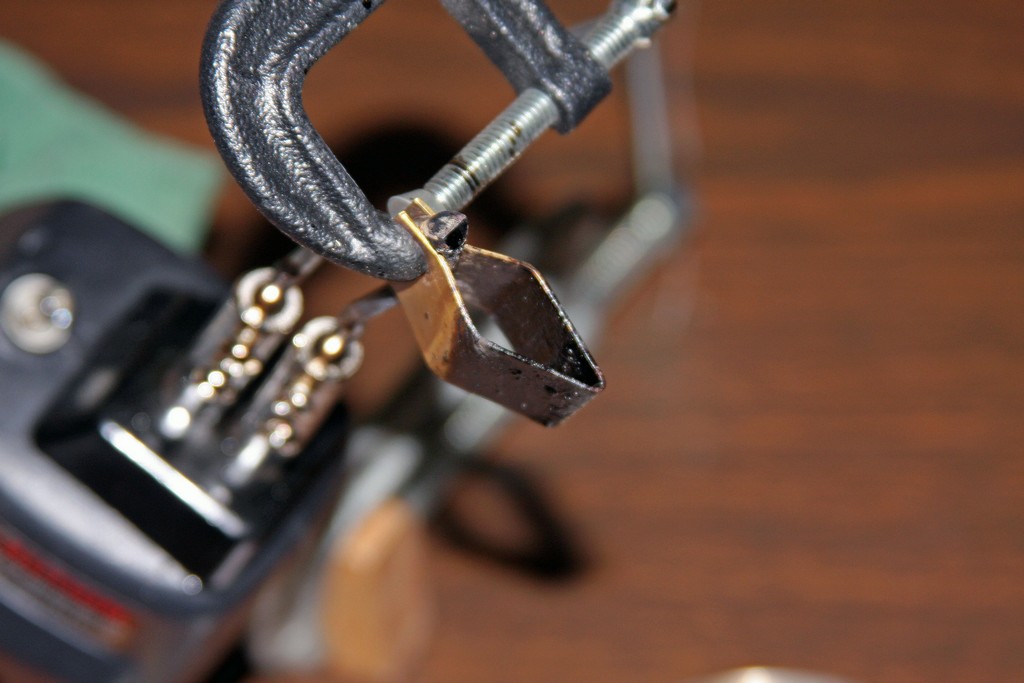
Lap Maintenance: Pressing & TrimmingPitch Laps need care as they are used. Each lap seems to have it's own "personality" and you will have to get a feel for how your lap behaves, given it's hardness, the ambient temperature and humidity, and your particular polishing style. On this page, we discuss lap maintenance: Hot & Cold Pressing your lap, Trimming the Edges and Channels as they close or grow from pressing and use, building and Electric Channel Cutter, Brushing a Glazed Lap to rejuvenate it, and we briefly describe a Pitch Hardness Tester should you be concerned about the hardness or softness of your lap. lastly, we discuss How to Store Your Lap. 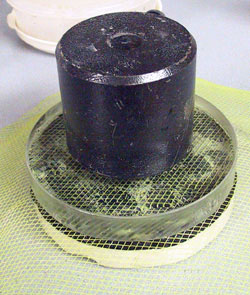 Cold Pressing a Lap: The yellow mesh is used to "micro facet" the lap. The black cylinder is an 8 pound steel counterweight from a German Equatorial Mount. Cast iron bar-bell weights are good for this purpose, readily available and inexpensive. Hot & Cold PressingBefore each polishing session, you should press your pitch lap with your mirror to ensure the lap conforms to the mirror surface and makes good contact at all points. If you are polishing and feel sticking or dragging, you should stop and press, as this is a sure sign the lap and mirror are not in good contact. Cold Pressing is done at room temperature. Hot Pressing involves warming the lap and often the mirror to increase pitch flow, but otherwise is identical to cold pressing. Cold Pressing is very simple. Spread polishing agent on the mirror and lap to prevent sticking. Carefully place the mirror on the lap, center over center, and place a weight of 5 to 15 pounds on the stack. Press for 15 to 30 minutes, using your judgment about how much pressing is needed to get the lap to conform to the mirror. 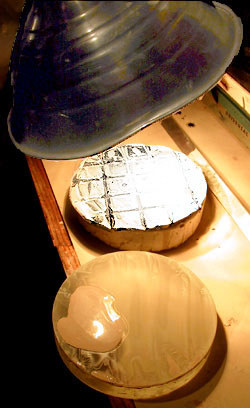 Using a Heat Lamp on a Lap & Mirror: CeO needs to be spread out before pressing and edge of lap needs to be trimmed. Micro Faceting: When hot or cold pressing, a plastic mesh from an onion or potato bag can be inserted between the lap and mirror. The mesh pattern will be pressed into the lap, giving it hundreds of small channels to spread polish and allow local pitch flow for better contact. See [Thompson73] Page 70. Hot Pressing is just like cold pressing, except you warm the lap or mirror before pressing. Do this when you feel your lap is not making good contact at all, and the pitch needs to flow a lot to achieve good contact. Of course, the more the pitch flows, the more often you will need to trim channels and edges. The two most popular warming techniques are hot water baths and heat lamps. Hot water baths work well and never overheat the lap. Fill a container or your sink with hot water, immerse the lap and/or the mirror for a few minutes until they heat up, then remove them and press. Heat lamps are also effective but harder to use - it is easy to hold the lamp too close and locally melt or boil a section of lap, which is not good. Hold the heat lamp 12 to 18 inches away, and keep the beam moving around on the lap to heat it evenly. When both the mirror and lap are warm, turn off of the lamp and press normally. When finished pressing, remove the weight and check to see that the mirror slides uniformly over the lap. If there is sticking or skipping, you may not have pressed enough. 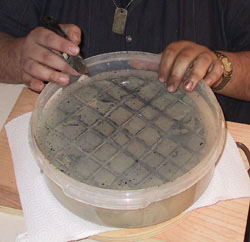 Trimming Lap Channels: Working with the lap immersed in water, Wayne opens up the channels on his 12-inch lap with a utility knife (The "dog tag" is a Gibeon meteorite slice) Trimming Edges & ChannelsChannels: As you press and work with your lap, the channels, which allow the pitch to flow and conform to the mirror surface will slowly close up. When this happens, they must be opened up again. The most common way to do this is with a utility knife or single-edged razor blade. As shown in the photograph, many people like to do this operation with the lap under water, as it contains the flying pitch chips and seems to prevent unexpected cracking. When done, channels should be about 1/4-inch wide, and about 90% as deep as the lap thickness. You don't want to channel all the way down to the substrate, as that might breach your waterproofing. Other techniques to re-channel include using hot knives or other objects to re-press channels; soldering irons (smelly); and even saws (what a mess!). The hot object techniques can leave raised ridges which take further time to press flat. The utility knife may seem slow and hard work, but all-in-all it is probably the best tool for this tedious job. 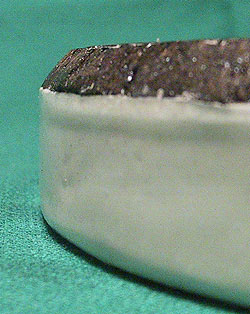 A Nicely Trimmed Lap Edge Edges: As you press and work, the edge of the lap will also spread outwards and begin to overhang the edge of the tool. You want to keep the lap slightly smaller than your mirror, and you do that by trimming the edge of your lap with a slight inward bevel. As seen in the photograph, this freshly trimmed lap edge is beveled inwards at about a 45 angle. This is done with a utility knife or single-edged razor blade. Working under a running faucet or in a bucket of water works well. When holding the lap on edge, remember you can leave thumbprints in the moldable pitch if you squeeze too hard. An Electric Channel CutterOne way to avoid some of the mess of cutting channels with a blade is to melt the pitch away with an electric heating device. Randy Fender of the John J McCarthy Observatory in New Milford, Connecticut brought the setup pictured to the Stellafane Mirror Class, and we thought it should be included here because it is simple to make and use by an individual and yields good results. He built it from plans at The ATM's Workshop improving it with an ad-hoc stand so he could use by himself. See the source page for details and dimensions of brass cutting blade.
Brushing a Glazed Lap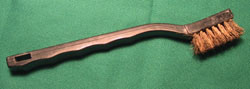 Brass Brush Used to unglaze laps. Approximately 7 Inches long. Brass is preferred as it will not rust, however steel bristles brushes can also be used. After much use, or long storage, a lap can develop a glazed or crusted surface. Polishing agents, such as Cerium Oxide or Rouge, can no longer embed themselves in the lap due to this hard surface. Many people like to pour a new lap when this happens. However, a lap can often be rejuvenated by brushing. Using a small brass brush (often sold in home center paint departments or hardware stores near welding supplies) you simply brush the surface until the glaze gives way to normal pitch. Rinse and then press before further use. Again, laps rarely have to be brushed. If you are working steadily along, and your lap is less than a month old, it probably does not need such severe treatment. 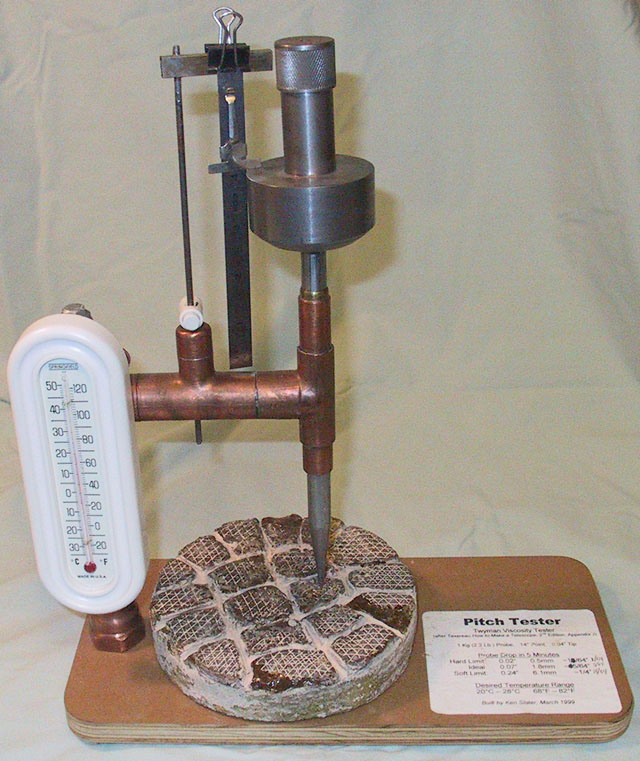 Pitch Hardness Tester
built by Ken Slater in 1999 Pitch Hardness TesterA pitch lap needs to be neither too hard or too soft. If it is too soft, it will likely dig into the mirror edge and roll it; if it is too hard it will not conform to the mirror surface at it will be hard to get a good polish and almost impossible to figure your mirror. If laps are many months old, or stored under bad conditions, they may harden. Hard laps often produce "sleeks", or minute scratches on the surface of the mirror. The standard amateur test of pitch hardness is described in [Texereau84] fig. 23 "Heavy thumbnail pressure leaves a mark like this in 10 seconds" and the illustration shows a small crescent-shaped gouge in the pitch. This has been used by amateurs for years, but is very subjective. A more objective way would be to use some sort of instrument with known characteristics. In [Texereau84] Appendix J a Twyman Viscosity Tester is presented, and an example of such an instrument is shown at right. A 1 kilogram steel rod with a specific point shape is rested on the pitch and it's penetration is measured after 5 minutes. Using the penetration depth and temperature, you can check your pitch hardness against a chart in that appendix to see if it is acceptable. A slightly different pitch tester is described in the SPIE paper Fun Facts about Pitch & the Pitfalls of Ignorance along with tables and formulas for use and analysis. Most people have never seen a instrument like this, and few mirror makers have used one. If you don't have access to a metal lathe, it would be difficult to build one. Most pitches that you buy with kits will be just right. But if you are concerned about your pitch hardness, this is a quantitative way to check it out. How to Store Your Lap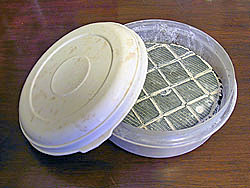 A 6" pitch lap stored in a food storage container Pitch laps need loving care between polishing or figuring sessions. The rules to follow:
For laps under 10", a plastic food storage container makes a good home. You can also use a zipper lock plastic bag, with enough air in it so that the bag will not fall onto the lap face. Some people advocate storing laps under water, the theory being that the water helps hold in the volatiles that keep the lap viscous. I have not found this to be necessary if you store your lap in an airtight container. Laps will not store indefinitely. Laps do dry out. You should have no problem storing a lap for about a year in good conditions, but beyond that the lap will need to be evaluated and might need to be replaced. If you plan to store you lap for a long time, you might consider putting it in a refrigerator or freezer (but let it thaw slowly when you wish to use it again). Using Old PitchOccasionally we get an inquiry about using pitch from a kit that was bought many years ago. Our best advice, given the relatively low cost of pitch, is don't use it. Pitch is finicky stuff, and old pitch can be hard and prove to be unworkable for the inexperienced amateur. The advice given above is based on experience and word of mouth information from experienced opticians; there is actually little published about the shelf life of pitch. There are two basic kinds of pitch used by the amateur telescope maker: Burgundy Pitch and Gugolz Pitch. Burgundy Pitch has a caramel color and is most likely to be found in older kits, it is the traditional pitch used by many generations of ATMs. It is literally tree sap (Spruce Resin) with many volatile organic solvents naturally contained within it that can evaporate off after many years of storage. Most Burgundy Pitch contained in older kits has been repackaged into paper cups or plastic bags, not the best containers for long term storage. We don't recommend using new Burgundy Pitch, because of its inconsistent hardness and the difficulty of melting it without changing its hardness -- we certainly would not recommend using very old Burgundy Pitch which could only be more difficult and frustrating to work with. Gugolz Pitch (sometimes called Swedish Pitch) has a black color and is used in almost every professional optical shop these days. It comes in 1kg sealed cardboard tubes and has very good batch to batch consistency. There are fewer volatiles in it to evaporate off over time. It is what we recommend you use for pitch, and if you have old Gugolz that is clean and uncontaminated, we would certainly give it a try. After pouring a lap with it, pay special attention to its hardness, make sure that a fingernail pressed into it for a few seconds will leave a large mark; The biggest risk with old pitch is that it will be too hard. If you don't think it is soft enough, then toss it and buy new. |
||||
|
Back to the ATM Index Page |
||||