
Tube Rings
Tube rings are reinforcements at the ends of the tube to help mitigate the inevitable wear, denting, and fraying that will occur as your telescope is transported, used and stored. They are optional, but can add quite a bit to the life of your tube, and if done nicely can add to the appearance of the tube. Tube rungs can have other purposes also, such as holding on rigid dust caps or solar filters.
The classic Dobsonian style tube rings are made out of ¾ inch plywood - about 1 inch in width, and mounted on the outside of the tube. They function well, but require cutting a lot of precise curves and can waster a lot of plywood if you don't have a use for the center cutouts.
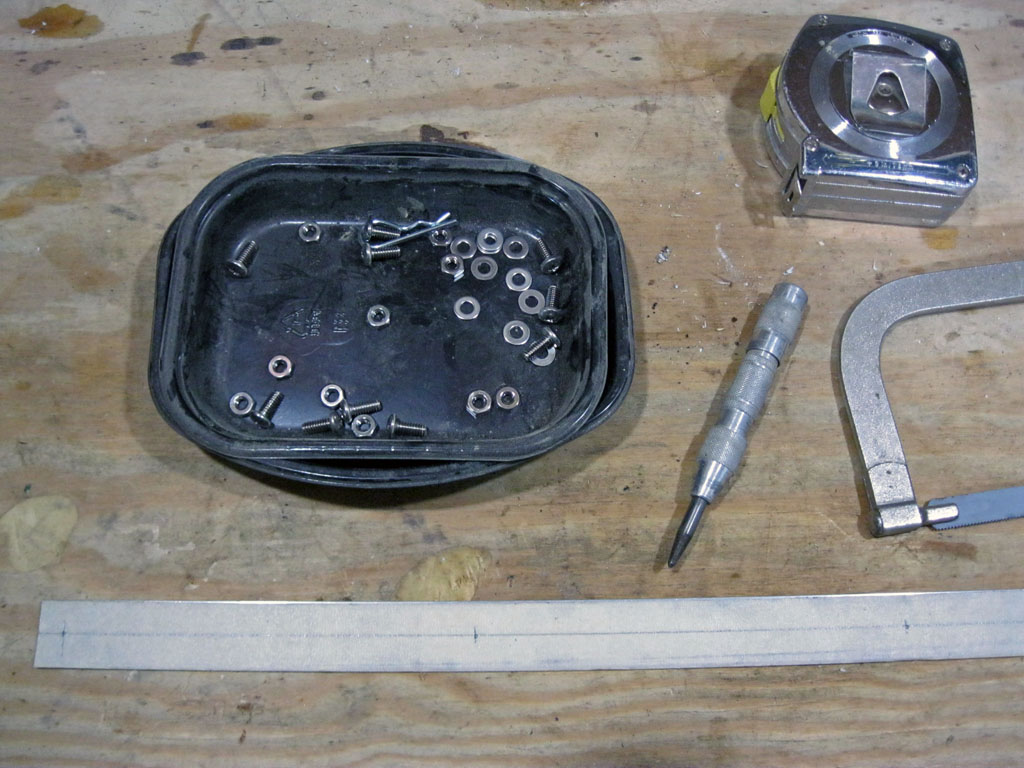
Another way to make tube rings is to use a thin piece of aluminum which can be easily bent by hand around your tube. You might have to work a bit to find the material - we visited about 6 local hardware stores until we found what we were looking for, in a smaller hardware store. We bought two pieces of flat aluminum, 1 inch wide, 1/16 inch thick and 4 feet long.

First, you need to calculate the length of the piece you will need. Use the formula for the circumference of a circle: Diameter x Pi = Circumference. In our case, our tube outside diameter is 8¼ inches, and multiplying by Pi (3.1415) yields a circumference of 25.917 inches, which is a little less than 25-15/16 inches.
The first job is to cut your piece to length using a hacksaw, and then cleaning up the cut edges with a file or sandpaper. Then you need to drill attachment holes. We will logically use 4 holes spaced at 90° apart around the tube; physically this means 5 holes, because we need one on each end. We will use ½-10 pan head stainless steel bolts to hold the ring on, so we need to drill the holes for #10 hardware, and will use a 3/16 inch drill. The holes are centered on the width, three holes are at ¼, ½ and ¾ of the length of the ring, and the two holes at each end are 3/8 inch from the ends. Center punch the hole locations, drill and de-bur the five holes. We used a piece of very fine steel wool to then buff up the ring, removing a few dark marks that were there when we bought it.
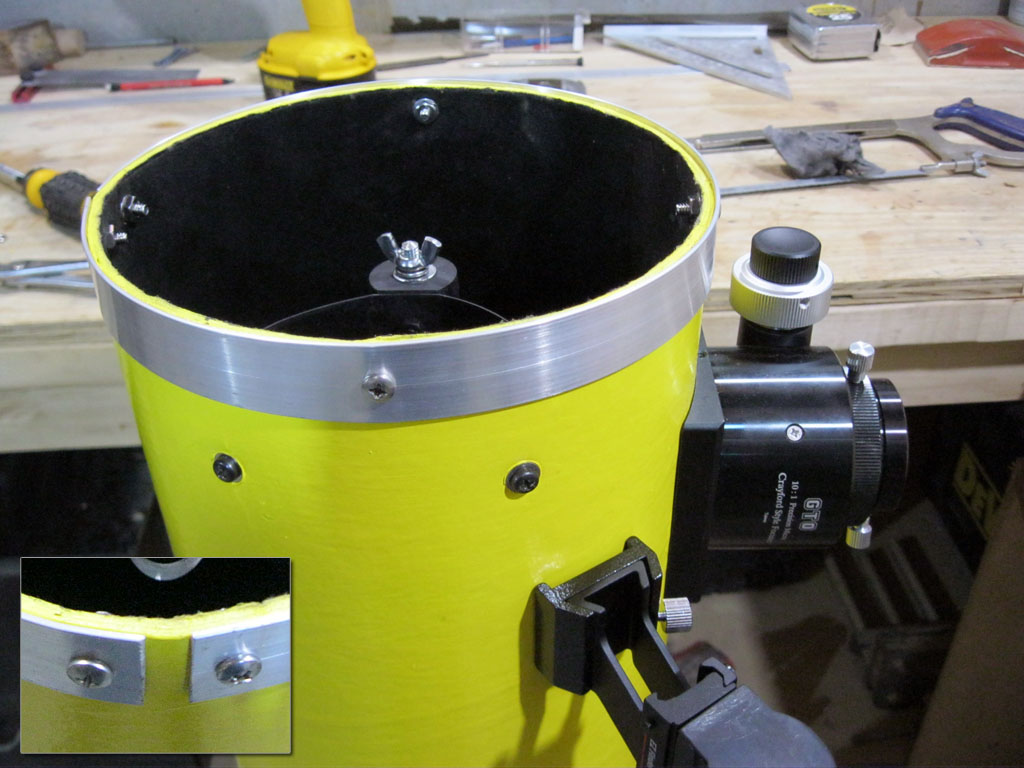
Remove your primary mirror - you don't want anything falling on it. Then with the tube standing on end, attach the ring at the center hole first (which we aligned with the focuser, so the joint would be opposite it). You want the ring to project past the cardboard tube a slight amount, about 1/16 inch, so that it takes any impacts and not the cardboard. Then using your hands, bend the ring around the tube until the next set of holes, keeping it aligned parallel to the tube end, and fasten with a bolt (clamps are helpful here). Finally, the hardest part is bending the end of the ring - you might need to use some pliers, as the final few inches are hard to grasp by hand and curve to the tube. Of course, you need to paint the hardware inside the tube black when done.
When done, our top tube ring is shown in the last photo - pretty nice looking over all, but as the insert shows, there is a gap at the ends. So despite careful measuring and cutting, it came out too short. You certainly could leave it a bit long at one end, partially install it on the tube, and then cut and drill the final end after marking the length on the tube and removing the ring.
Repeat this process of the ring at the other end, removing your diagonal mirror to protect it while you work. With metal tube rings installed, your scope will hold up better against normal dings and bumps.
Previous: Finders
Next: Solar Filter
Back to the Build a Dobsonian Master Index