

Build a 'Plumbing Parts' Focuser
This simple friction-fit focuser built out of plumbing parts can be built in a couple of hours for $5 or less (less if you have some scrap wood and glue on hand). This is a 1¼ inch focuser, there is no plumbing part that easily fits 2 inch eyepieces.
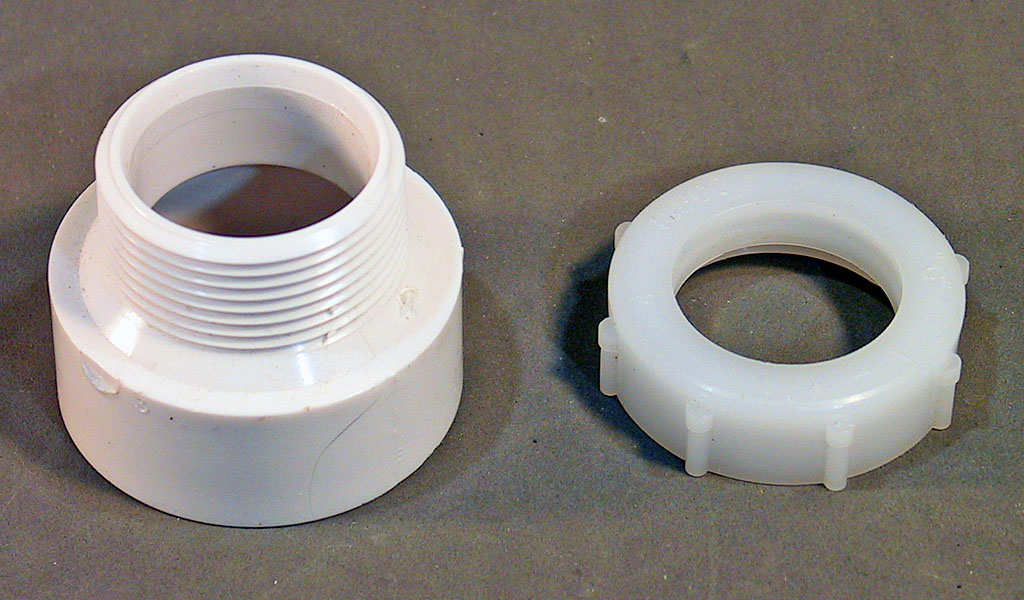
The key part is a 1¼ inch slip-joint to 1½ inch female PVC drain pipe adapter. In the United States, bathroom sink drainpipes and traps are 1¼ inches outside diameter, the same diameter as eyepieces (interesting, the standard for kitchen sinks is 1½ inches). At the wall or floor, the slip-joint piping turns into schedule 40 pipe, usually 1½ inch nominal (which has an approximately 2 inch outside diameter because of it's thick wall). You can buy an adapter like this for about $2 anywhere plumbing parts are sold. Your 1¼ inch eyepiece will slip right in, and the hand-tightened nut will adjust the fit. The part we bought has a one piece nut and collar (the part that expands to grip the eyepiece). Another popular style has a separate nut and collar (and often is sold with both 1¼ and 1½ collars to handle both size of slip-joint pipe). Either style will work.

Scuff up the inside of your plumbing adapter with sandpaper and paint it flat black.
Now, you need to build a base. We used a piece of pine board (not plywood) that was ¾ inch thick, and 3 x 3 inches square. Lay this on your tube and sketch the tube curvature on one edge. For strength, it is best to do this with the grain of the wood perpendicular to the length of the tube. Using a curved blade on your forming tool, hollow out part of the board so it will fit the curve of your tube. It took us about 20 minutes of work to do this.
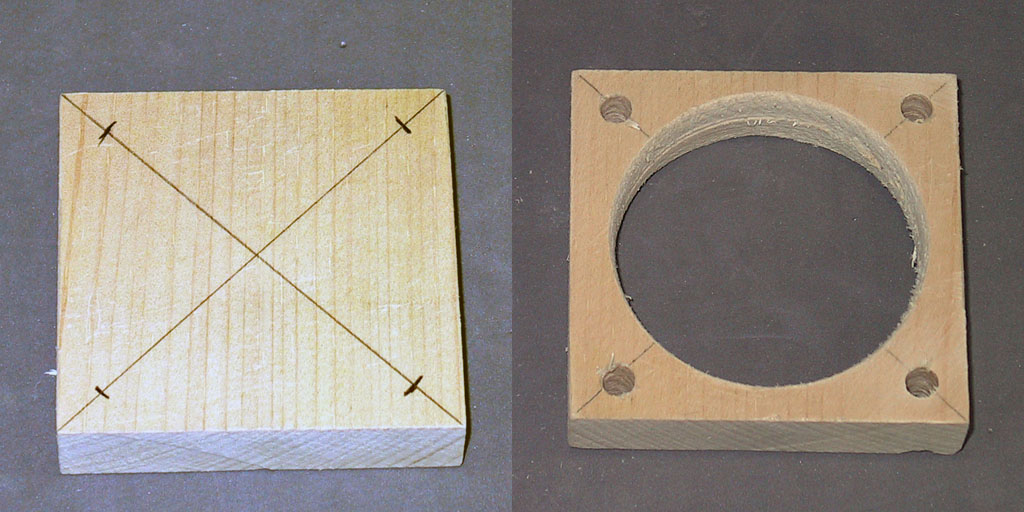
Now we need to layout the locations of five holes on the board. Start by drawing an "X" from corner to corner - this will located the center. Mark ½ inch up from each corner - this is where the four ¼ inch mounting holes will be drilled. The center hole needs to be able to fit the big end of your plumbing part. Ours measured 2¼ inches, so we used the 2-3/8 hole saw we have (same one we used on the mirror cell), which is a little big, but we compensated with a thick glue. You could also saw this hole out with a coping saw if you don't have a big hole saw. Drill out the holes, then sand and finish as you like (we stained and polyurethaned ours).

After the paint dries, it's time for assembly. We want the tube to project a bit below the base, so it will project into the tube a bit. Therefore, we used some craft sticks to raise the base up a bit. Take car to keep the to parts square, you don't want your focuser to be tipped. Then glue the two parts together. We used silicon sealer, as it filled the gap we had nicely. Epoxy would word well also (just make sure you tape the bottom temporarily so it doesn't all run out). Expanding wood glue should also work.
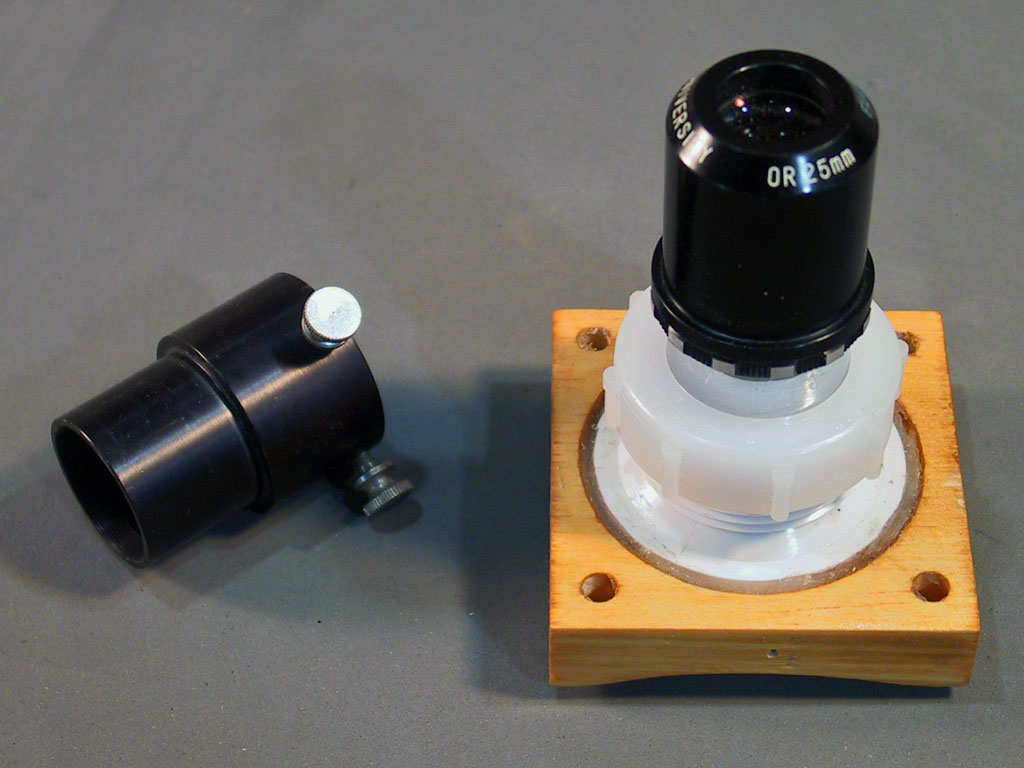
That's it, you are done! See the next page for how to mount your focuser on the tube.
You might notice that some eyepieces don't have a long tube and your focusing range might be limited. You can buy an eyepiece extension tube to help with this. The one shown in the photo adds 1 inch to the eyepiece length.
Previous: The
Focuser Next: Installing
a Focuser on the Tube
Back to the
Build a Dobsonian Master Index