

Finishing a Mirror Cell
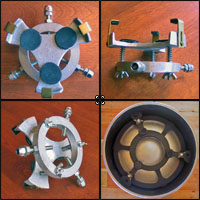
one needs to be painted.
Wood or metal, a primary mirror cells should not reflect light, and therefore should be painted or stained a dark, light absorbing color. Many purchased mirror cells will come painted a flat black, but not all - the cast aluminum cell we show at right needs to be painted flat black. Of particular concern would be the three forward pointing 'rims' and mirror clips that are most likely to reflect light back into the tube. Portions of the the cell hidden beneath he mirror are less problematic, but are usually painted anyway. Flat black spray paint made for application to metal is what is typically used.
A wooden mirror cell also needs to be darkened, but also should be sealed against moisture intrusion. Paint works well, but some people prefer a dark stain followed by a coat of sealer. A satin, non-glossy polyurethane is a good choice, but oil sealers also work and are typically less reflective.
Finishing Our Mirror Cell
You are welcome to finish your cell any way you would like to. For our cell, we will stain and polyurethane the bottom and sides and central hole of the bottom part of the cell (the parts that are most visible at the rear of the tube). The front of bottom of the cell will be spray painted flat black, as will the entire top part. This 'two-tone' paint job is a little more work, but will make the telescope look a bit nicer when viewed from the mirror end.
To prepare for painting, the mirror cell is disassembled. The bolts, springs, washers and wing nuts are put aside, they all sit behind the mirror and and will not be painted. The tee nuts, mending plates and side supports are left in place to be painted.
Preparing for Finishing
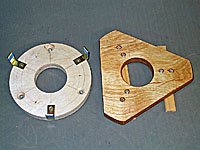
The wooden cell parts should be sanded to remove any 'fuzz' on the cut edges and make a smooth surface for finishing. You should also slightly round the edges when sanding. You might need to temporarily remove the side brackets and mending plates to sand; re-install them when the sanding is done. The recessed tee nuts should not be in the way of sanding. We're also not worrying about sanding off the layout marks on the painted parts, but the stained parts need to be free of any pencil marks. Brush off dust with a brush, then use a tack cloth to wipe down the parts and remove any remaining dust.
We will attach our mirror with Silicon Sealer, and we want it to bond to the underlying wood or metal, not the paint which could peel off. For the wooden mirror cell top, we will drill recesses after finishing to expose bare wood. For the side support brackets, we cut some masking tape strips to place over the side holes, so they will not get painted. We will stain and urethane first, and paint the black last.
Final Assembly
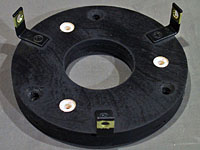
When finishing is complete and everything is dry, you should remove the masking tape from the side supports and drill out the glue dimples on the the upper ring. The purpose of the glue dimples is to make a little paint-free recess for the three silicon glue blobs that will support the mirror from the bottom. We used a ½ inch spade bit to make a 1/8 inch recess. The locations for the three glue dimples should have been marked with an awl prior to painting.
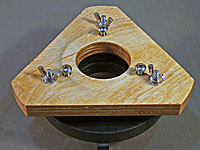
Lastly, reassemble the mirror cell, just as your did for the test assembly prior to painting, with one possible exception: Since we want the pull bolts to stay tight to the upper cell, you might want to put a drop of thread lock (best known brand is Loctite, others exist - Look where glue is sold in your hardware store) on the bolt where it will end up inside the tee nut. This will lock the tightened bolt to the nut, and it will not loosen under normal use.
Congratulations, you have made a very nice home made mirror cell. Our completed cell is shown at right, with another view at the beginning of the mirror cell section.
You are now ready to install the primary mirror in your cell.
Previous: Building the Mirror Cell Next:
Installing a Primary Mirror in a Cell
Back to the Build a Dobsonian Master Index