
Final Assembly
Now that the tube is painted or otherwise finished inside and out, we will do the final assembly of optical components into the tube, and most importantly, make the final steps in darkening the inside of the tube.
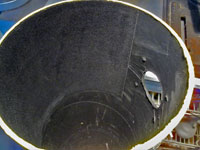
Primary Mirror: Mount your primary mirror in its cell in the tube. If you are using our homemade mount or similar, there is no additional darkening to be done, as we painted all tube facing surfaces flat black and there is no exposed hardware. If you have another style of cell, then you want to make sure there is no shiny hardware in the tube, so paint any struts, bolts and washer that may be present flat black. You might need to do some painting before insertion into the tube, and then do a final touch up after the cell is mounted. Using a small art brush works well for this final touch up.


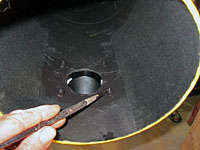
Additional Focuser Area Darkening: This part is optional. There are many techniques for darkening your tube and preventing unwanted reflections. Painting the inside of the tube flat black is the most basic first step. Beyond that there are many other things that can be done, such as baffles. One area which is particularly sensitive to reflections is the area of the tube directly below the focuser, and we are going to take some extra precautions here. You may have noticed that even flat black paint has some shine to it - it helps a lot but is far from optically dark. One of the best optical darkening surfaces is flocking paper, a fuzzy black material that does a great job in absorbing light. Unfortunately it is somewhat expensive, so most people do not use it to completely cover the inside of their tubes. We will just use a small piece to cover the area directly under the focuser, as shown in the photo. Black felt can also be used for this, it is not quite as good as flocking paper, but usually better than paint. We install it now, before the focuser and diagonal, so we can mount these items through it, if necessary.
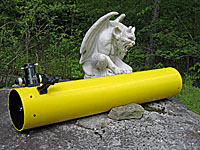
Focuser: Next we mount the focuser, and again use a small brush to paint any inside the tube mounting hardware flat black after it is mounted. This is best done with the tube horizontal, the weight of the focuser will roll the tube so the bolts will point up as the focuser points down (our tube in the photo is balanced on a workshop stool). This prevents drips from hitting the primary mirror.
Diagonal Mirror: Finally, we mount the diagonal mirror and its holder, and paint any mounting hardware flat black.
Optional Accessories: At the end of the OTA section, we list a few optional accessories, such as Finders, Dust Caps and Tube Rings. These should be mounted on the scope (in the case of dust caps, the solid kind, not the shower cap kind) before collimation. And of course, have your paintbrush handy with flat black paint to darken the mounting hardware inside the tube.
This completes the Newtonian Optical Tube Assembly! While the telescope is now completely built, we still need to collimate it, which lines up all the optics for perfect images. We describe how to do this on the next page.
Previous: Painting the Tube Next:
Collimation
Back to the Build a Dobsonian Master Index